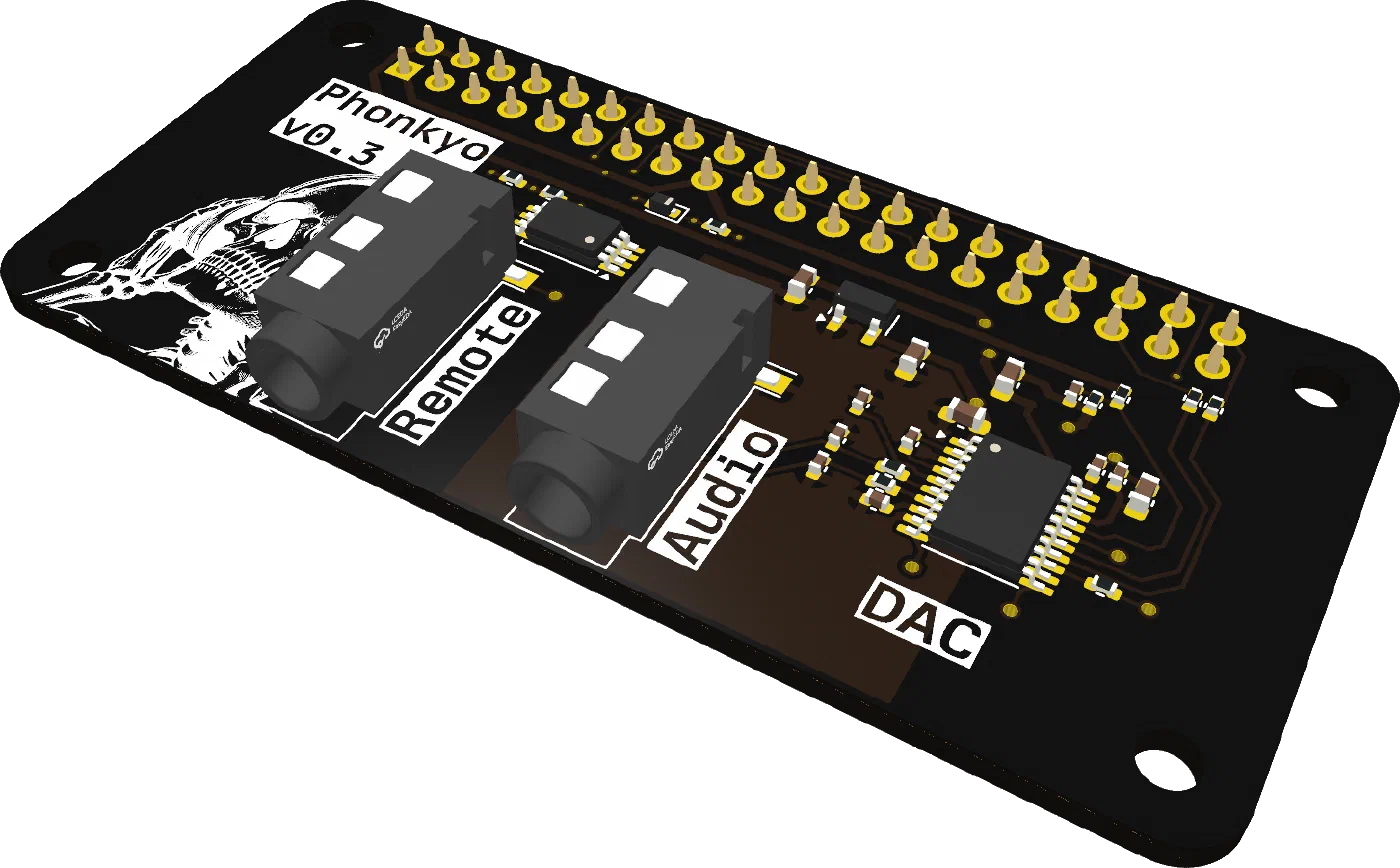
How it works
Onkyo receivers have a small 3.5 mm jack on the back labelled RI (Remote Interactive). It’s how an Onkyo dock tells the receiver to switch on and change to the dock’s input. Phonkyo speaks the same language, so to your receiver a Raspberry Pi looks like a dock.
- Your phone or Mac Spotify, AirPlay, Plexamp
- Wi-Fi
- Raspberry Pi + Phonkyo Plays the music, acts as the dock
- Audio 3.5 mm to RCA RI 3.5 mm to 3.5 mm
- Receiver DOCK input and RI jack
- You play something on the Pi: Spotify from your phone (it shows up as a Spotify Connect speaker, using raspotify), AirPlay 2 from an iPhone, iPad or Mac (using shairport-sync), or your Plex library through Plexamp running headless.
- Phonkyo sends the receiver a dock’s commands over RI: switch on, change to the DOCK input.
- The music comes out of Phonkyo’s DAC and into that input.
- After five minutes of silence, it switches the receiver off again, but only if it was the one that switched it on.
The switching is done by phonkyo-monitor, a small service that watches the
sound card. One command installs it along with the rest of the software; the
setup guide has the details. It’s tested on a Raspberry Pi Zero 2 W running Raspberry Pi OS Lite
(64-bit, Trixie).
Your receiver’s remote
With the receiver on DOCK, it passes the transport buttons of its own remote on to the dock. Phonkyo listens for them, so the remote that came with your receiver controls Plexamp:
- Play/pause, next and previous track
- Fast-forward and rewind, 10 seconds per press, and they keep going while you hold the button
- Repeat, cycling through off, repeat all and repeat one
This only works with Plexamp. AirPlay doesn’t let the receiving end control the phone that’s sending, and the Spotify player on the Pi can’t be controlled locally, so for those, use your phone. Shuffle and Menu don’t do anything yet.
On the board
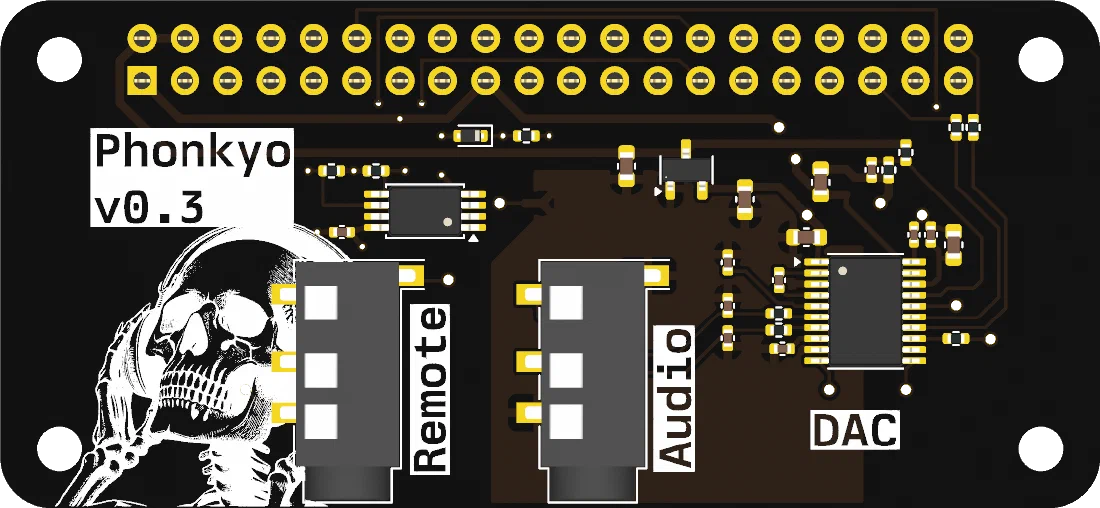
- Remote: a 3.5 mm jack for the RI bus, with a series resistor and an ESD clamp between the jack and the Pi.
- Line out: a 3.5 mm stereo jack driven by a TI PCM5102A DAC over I²S. It is the same DAC chip used by the pHAT DAC and HiFiBerry DAC, so it works with their drivers.
- ID EEPROM: the board tells Raspberry Pi OS what it is, so the sound card
comes up without editing
config.txt. - pHAT size: 65 × 30 mm, the footprint of a Pi Zero. It fits any Raspberry Pi with a 40-pin header.
Kits
Basic kit
€30 + shipping
- Assembled Phonkyo board
- 40-pin GPIO header, already soldered
Complete kit
Not available yet
- Assembled Phonkyo board
- 40-pin GPIO header, already soldered
- 3.5 mm to stereo RCA cable for audio
- 3.5 mm to 3.5 mm cable for RI
- 3D-printed case for a Raspberry Pi Zero 2 W with Phonkyo on top
Shipping is to European Union countries only.
Receiver compatibility
Phonkyo should work with any receiver that has an RI jack and a DOCK input, but RI support varies from one model to the next. Check that the features you need work with yours before ordering.
Volume here means changing the receiver's volume over RI. Software volume on the Pi always works, but it can only go as loud as the volume set on the receiver.
The receiver's own remote controlling playback through Phonkyo: play/pause, next and previous track, fast-forward, rewind and repeat. This works with Plexamp only.
This is the only receiver tested so far. If you have a different RI receiver, let me know what works and I’ll add it here.
Setup
Write Raspberry Pi OS Lite (64-bit) to a microSD card with Raspberry Pi Imager, turning on SSH and your Wi-Fi in its settings. Connect the board, power the Pi on and log in to it. Then there are two ways to install the software. Pick one.
One command. It installs the sound card, the players you choose and the receiver control, and reboots when it’s done:
curl -fsSL https://obcecado.com/phonkyo/install.sh | bash
Or, by hand. If you’d rather see or change every step, the setup guide does the same thing one command at a time. It’s an alternative to the command above, not a next step: if you ran the command, you’re done.
The setup guide also covers writing the card and connecting the board in more detail.
Design files
The schematic, board layout and the software for the Pi are all public in the phonkyo repository on GitHub, under a CC BY-NC-SA 4.0 licence. You can study them, change them and build your own board, as long as it isn’t for commercial use. If you share a modified version, it has to use the same licence.
Ordering
Orders are handled by email. Say which kit you want, how many, and which country it ships to. I'll reply with the total including shipping and how to pay. What I do with your details is on the privacy page.
Email an order phonkyo@obcecado.com